How to Make Vietnamese Xôi Xéo
Xôi Xéo is a delicious and easy-to-eat sticky rice dish with a distinctive flavor. This dish is closely tied to the memories of many generations of Hanoi residents. The process of making Xôi Xéo is meticulous but not difficult, and anyone can successfully make it on their first try.

Ingredients
- 500g sticky rice
- 100g mung beans
- 200g shallots
- 700g chicken fat
- Coarse salt
- Turmeric powder
- 2-3 pandan leaves
- Pork floss (for serving)

Ingredient Notes
- For the best Xôi, choose sticky rice varieties like Nhung sticky rice or Nếp Cái Hoa Vàng.
- If chicken fat is unavailable, you can substitute with pork fat.
- Pandan leaves add a fragrant aroma to the rice, but if you can't find them, it won't significantly affect the dish. However, don't use too many pandan leaves, as their strong scent can overpower the sweet fragrance of the sticky rice.
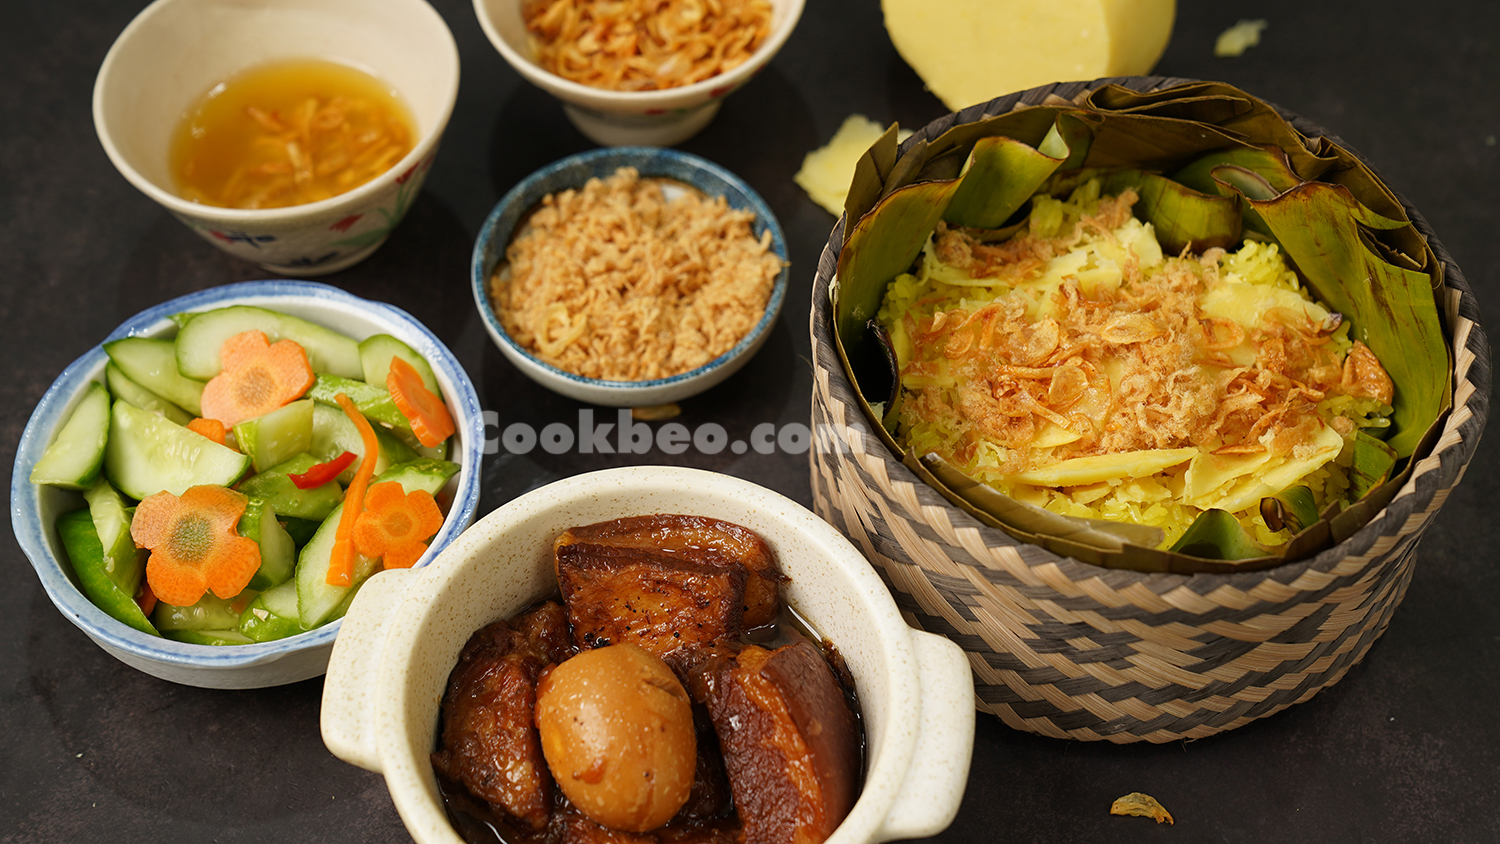
- In addition to pork floss, you can serve Xôi Xéo with braised pork, or some pickled cucumbers.
Instructions
Soak the Sticky Rice
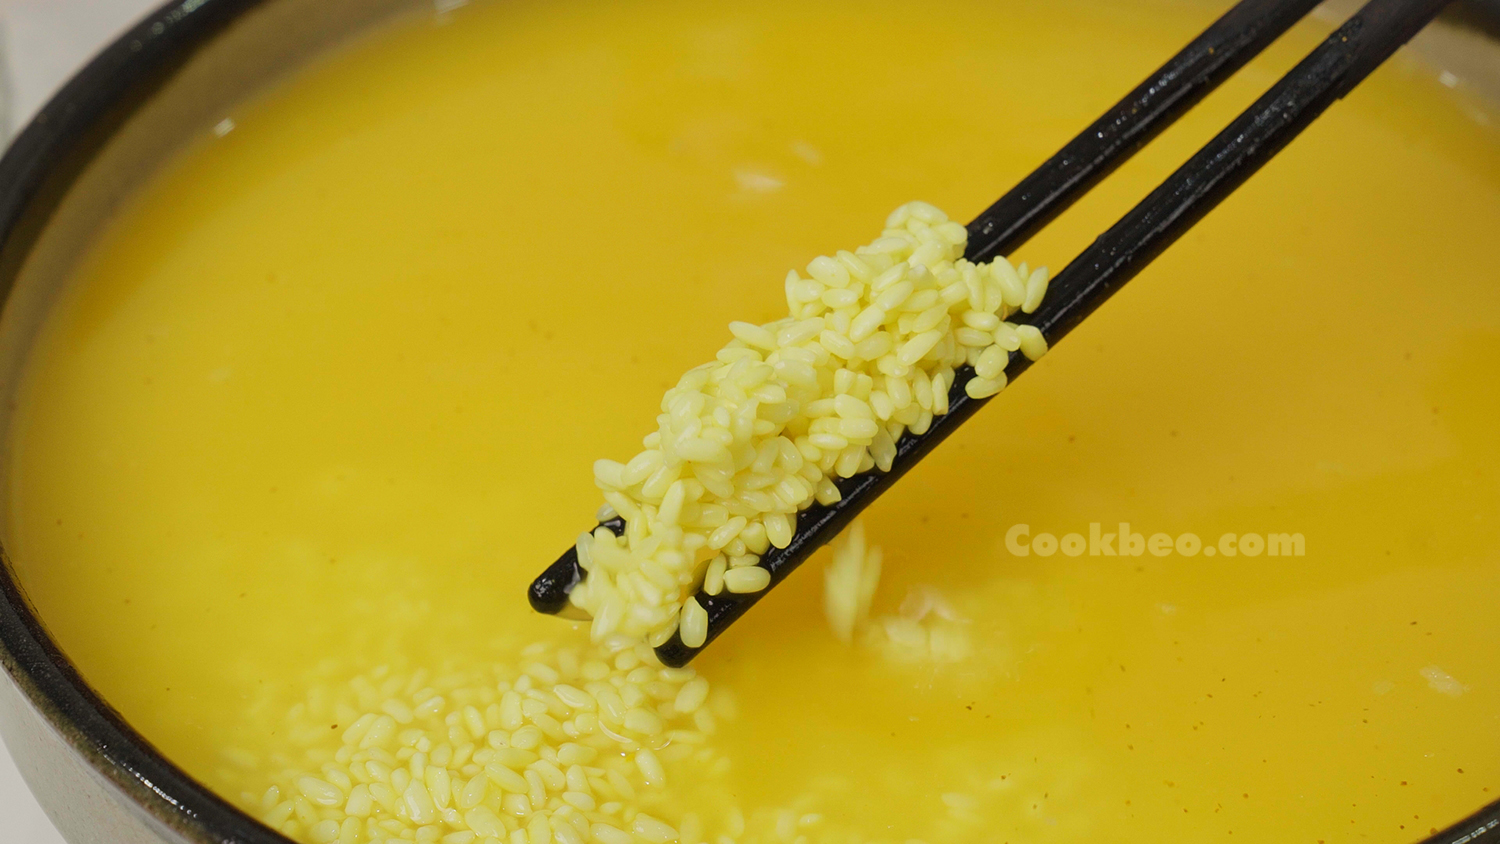
Rinse the sticky rice thoroughly, then place it in a bowl or basin and cover with water. Add 1 teaspoon of turmeric powder, stir well, and soak the rice for at least 5 hours.
As the turmeric powder tends to settle during soaking, the rice may color unevenly. To prevent this, gently stir the rice occasionally with chopsticks.
If turmeric powder is unavailable, you can use fresh turmeric. However, fresh turmeric has a stronger aroma, so use it sparingly.
In the past, Hanoi locals would soak sticky rice with gardenia leaves to give the rice a pale yellow color. Nowadays, people often use ready-made gardenia powder, turmeric powder, fresh turmeric, or saffron threads for convenience.
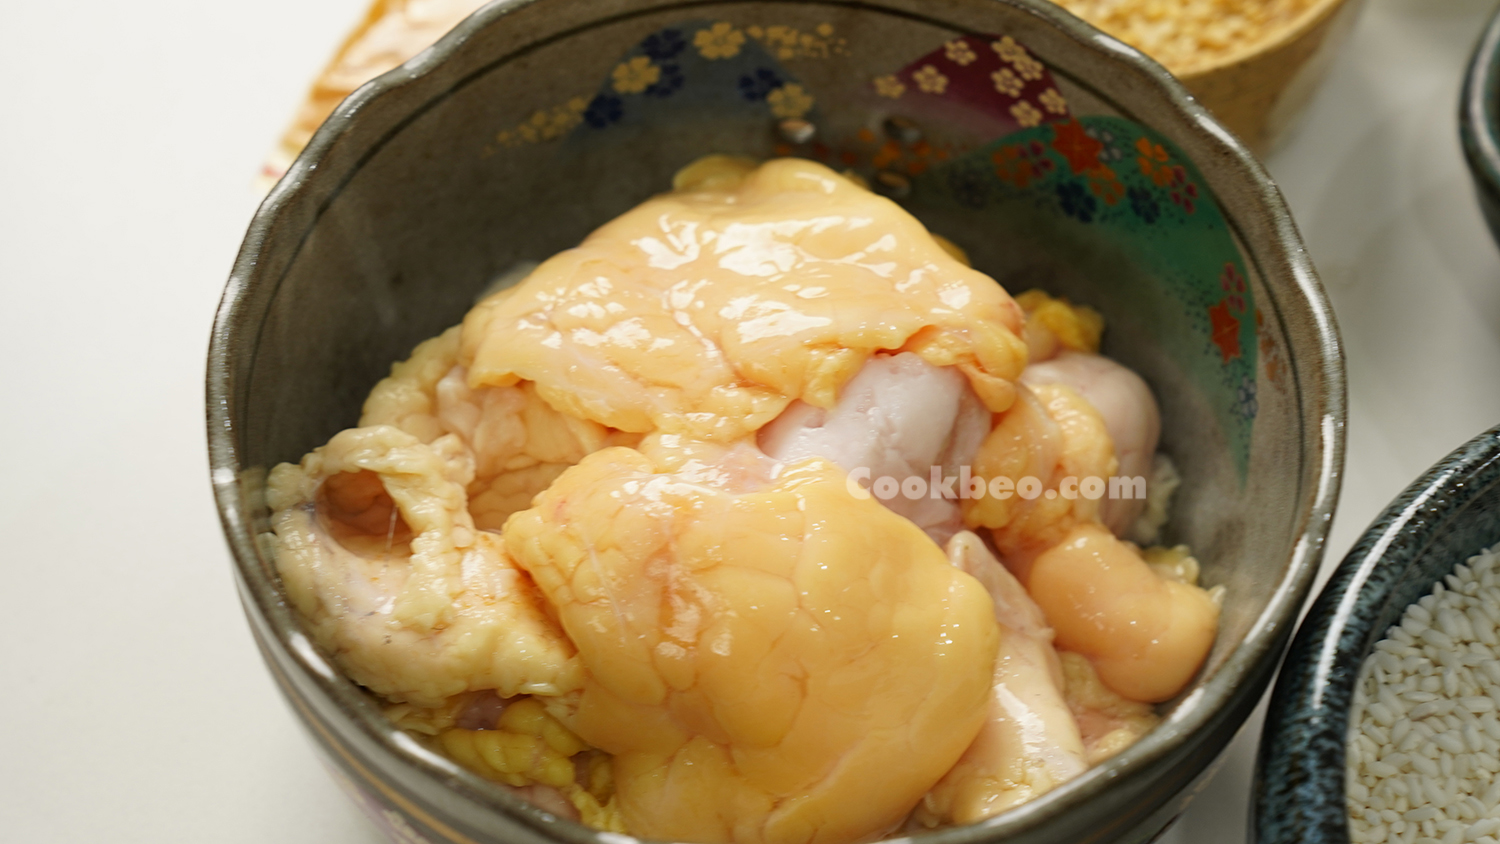
Render the Chicken Fat
Clean the chicken fat and cut it into small pieces to speed up the rendering process. Pat the pieces dry.
Place the chicken fat in a pan and heat it over medium heat to render the fat. Continue cooking until the fat shrinks into small, crispy pieces. Remove these crispy bits and set them aside in a bowl.
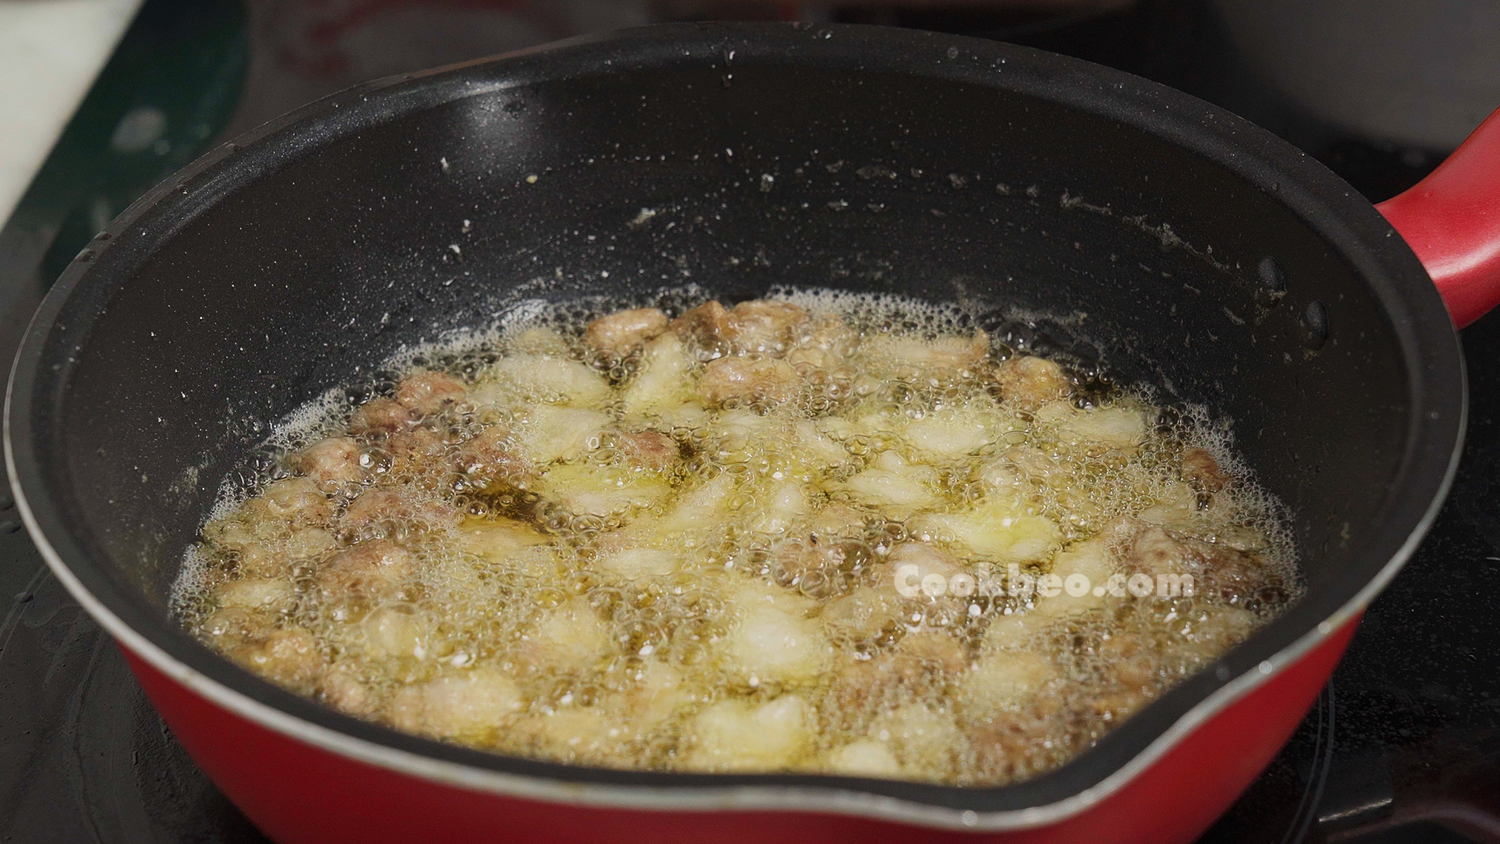
Use a fine mesh strainer to remove any small bits, leaving the rendered fat clear.
Make Fried Shallots
Peel the shallots and slice them lengthwise into pieces about 0.2cm thick. Avoid slicing too thinly, as slightly thicker slices will result in crispier fried shallots. Slicing lengthwise also helps prevent the shallots from breaking apart.
To keep the fried shallots crispy for longer, some people sun-dry the slices after cutting them to reduce their moisture content.
Place the sliced shallots in a pan with cold oil. Use the rendered chicken fat for frying to add flavor, and start with cold oil to ensure the shallots cook evenly. Fry over medium-low heat. If you start with hot oil, the shallots may burn on the outside while remaining undercooked inside, leading to soggy fried shallots.
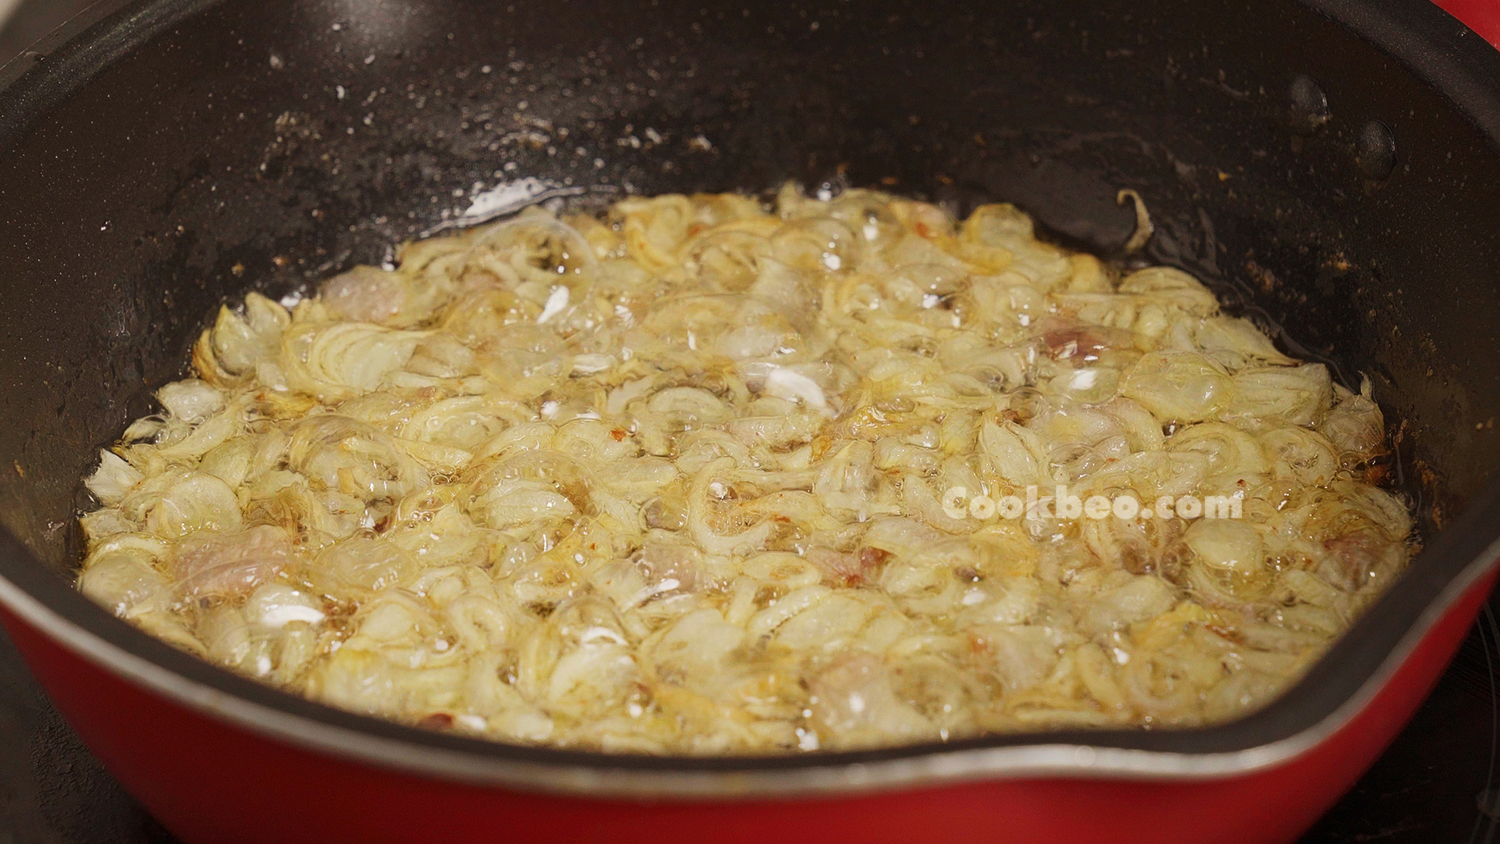
Once the shallots turn a light golden color and rise to the surface, remove them immediately. Drain the fried shallots thoroughly to keep them crispy. After transferring them to a colander or plate, spread them out with chopsticks to evenly distribute the heat. This method ensures that the fried shallots are crispy, fragrant, and beautifully golden.
Besides crispy fried shallots, one of the key elements of Xôi Xéo is the chicken fat used in frying. After frying the shallots, set aside some of the oil in a separate bowl. When the chicken fat cools down, scoop a spoonful into the bowl with the fried shallots. Once the sticky rice is ready, drizzle this oil over the rice for a delicious, fragrant flavor without being too overpowering.
Prepare the Mung Beans
Rinse the mung beans thoroughly and soak them in water for about 5 hours, changing the water occasionally to prevent the beans from becoming sour.
After soaking, drain the mung beans and rinse them again. Add water to a pot and place a steamer basket over it. The water level should be about halfway up the steamer basket. Bring the water to a boil.
Once the water is boiling, add the mung beans to the steamer and cook them over low heat. The mung beans should be steamed for about 30 minutes until fully cooked. Stir the beans occasionally to ensure even cooking.
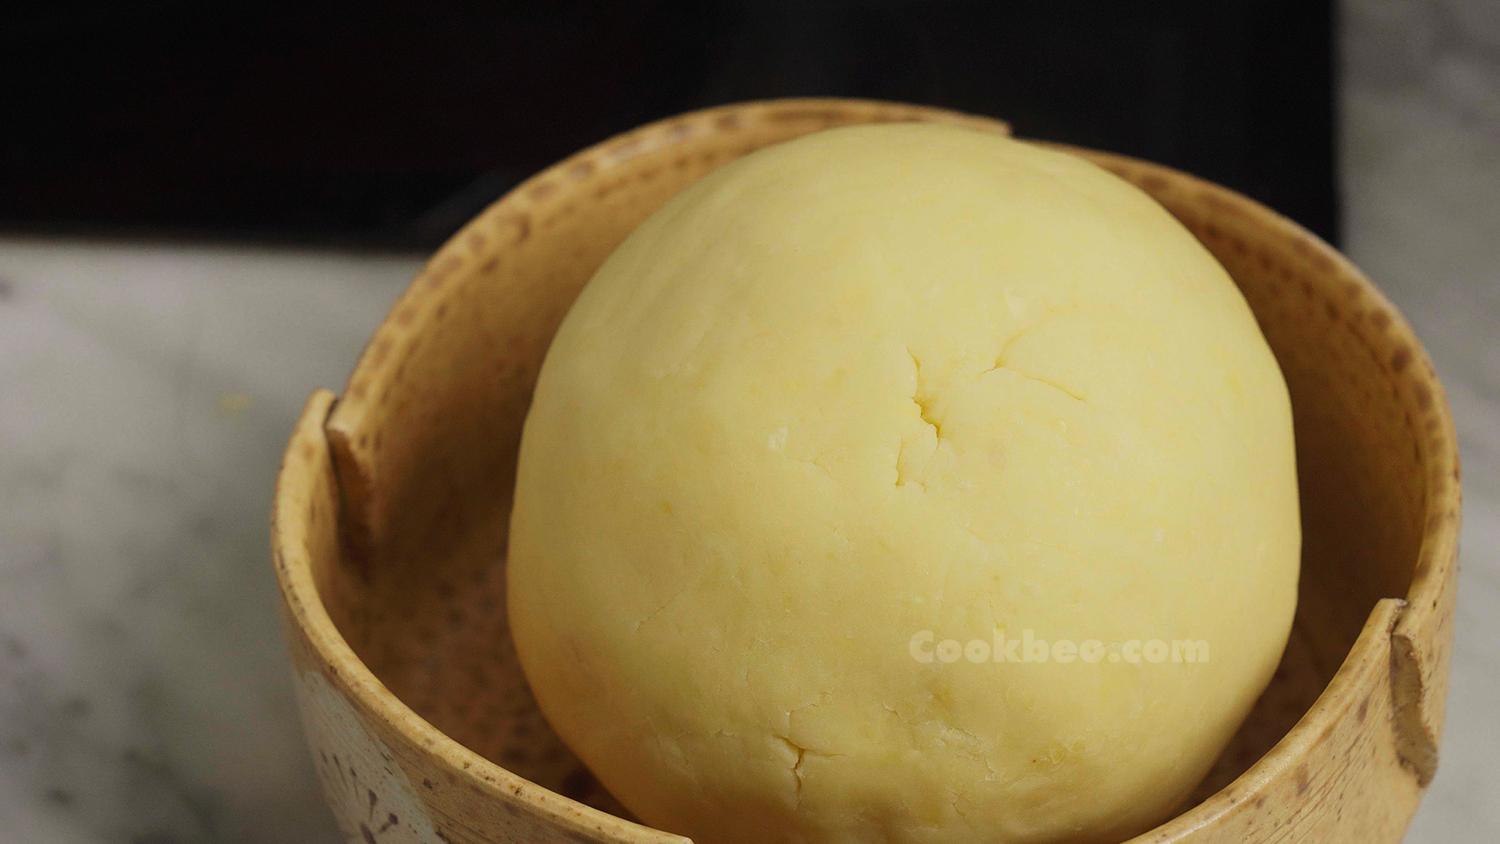
After steaming, transfer the mung beans to a bowl or mortar and mash them with a spoon or pestle. Be sure to add a spoonful of the chicken fat used for frying shallots to the beans as you mash them. This will make the beans smooth, fragrant, and flavorful.
Once the mung beans are mashed, shape them into a compact ball. Press the ball firmly to ensure that when sliced, the mung bean slices are smooth and cohesive rather than dry, crumbly, and porous.
Cook the Xôi Xéo
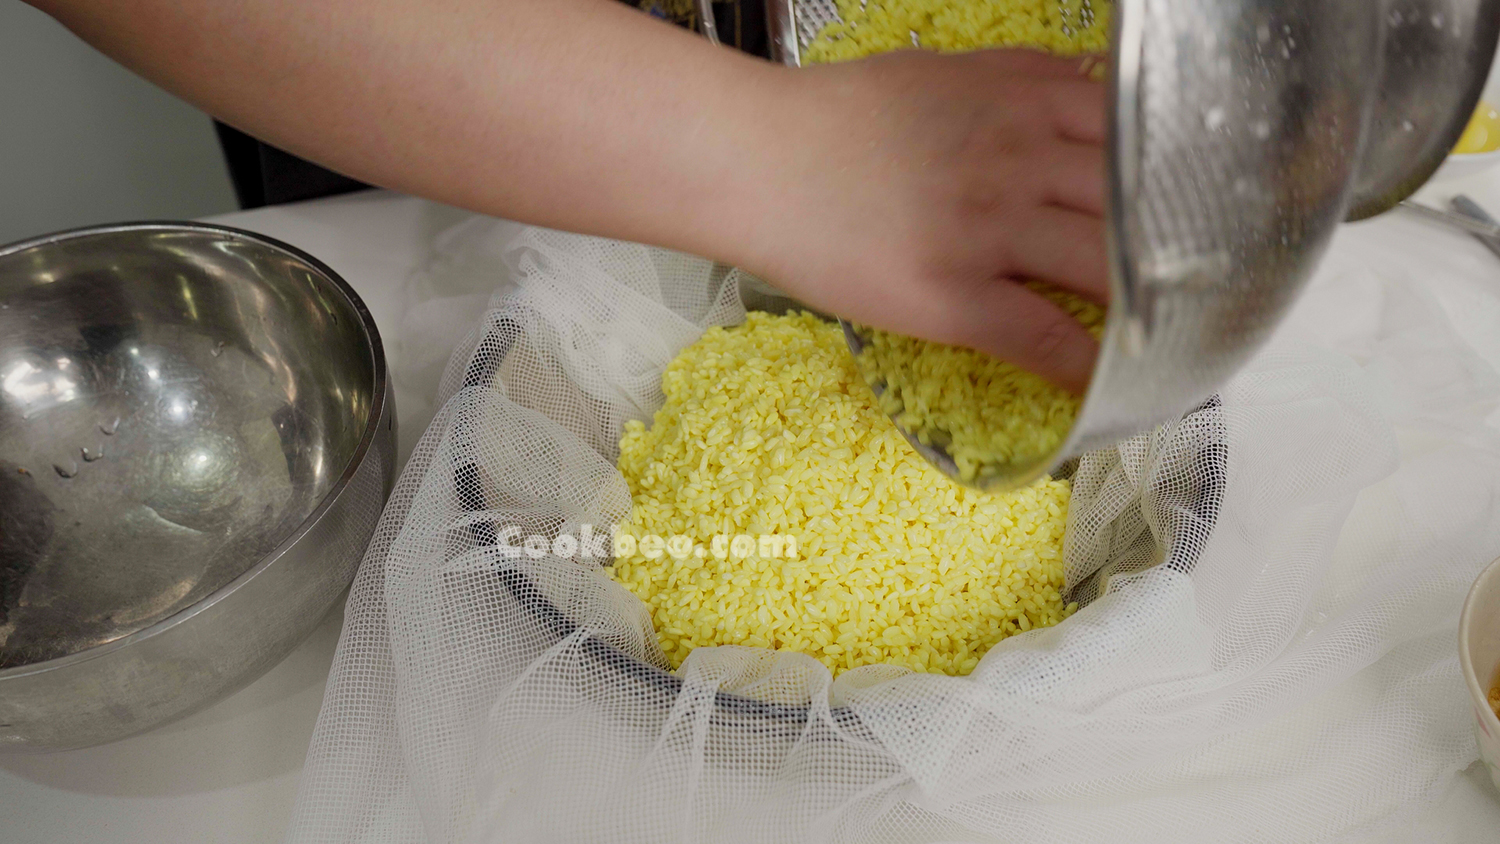
After soaking, rinse the sticky rice once more and drain. By now, the rice should have a beautiful pale yellow color and no turmeric smell.
Mix the rice with 1/2 teaspoon of coarse salt to enhance its flavor. Additionally, add 2 tablespoons of rendered chicken fat to the rice to give it a shiny appearance.
For easier steaming, place the rice in a cloth bag. This makes it easier to lift the rice out, prevents it from sticking to the sides of the pot, and simplifies cleaning the steamer.
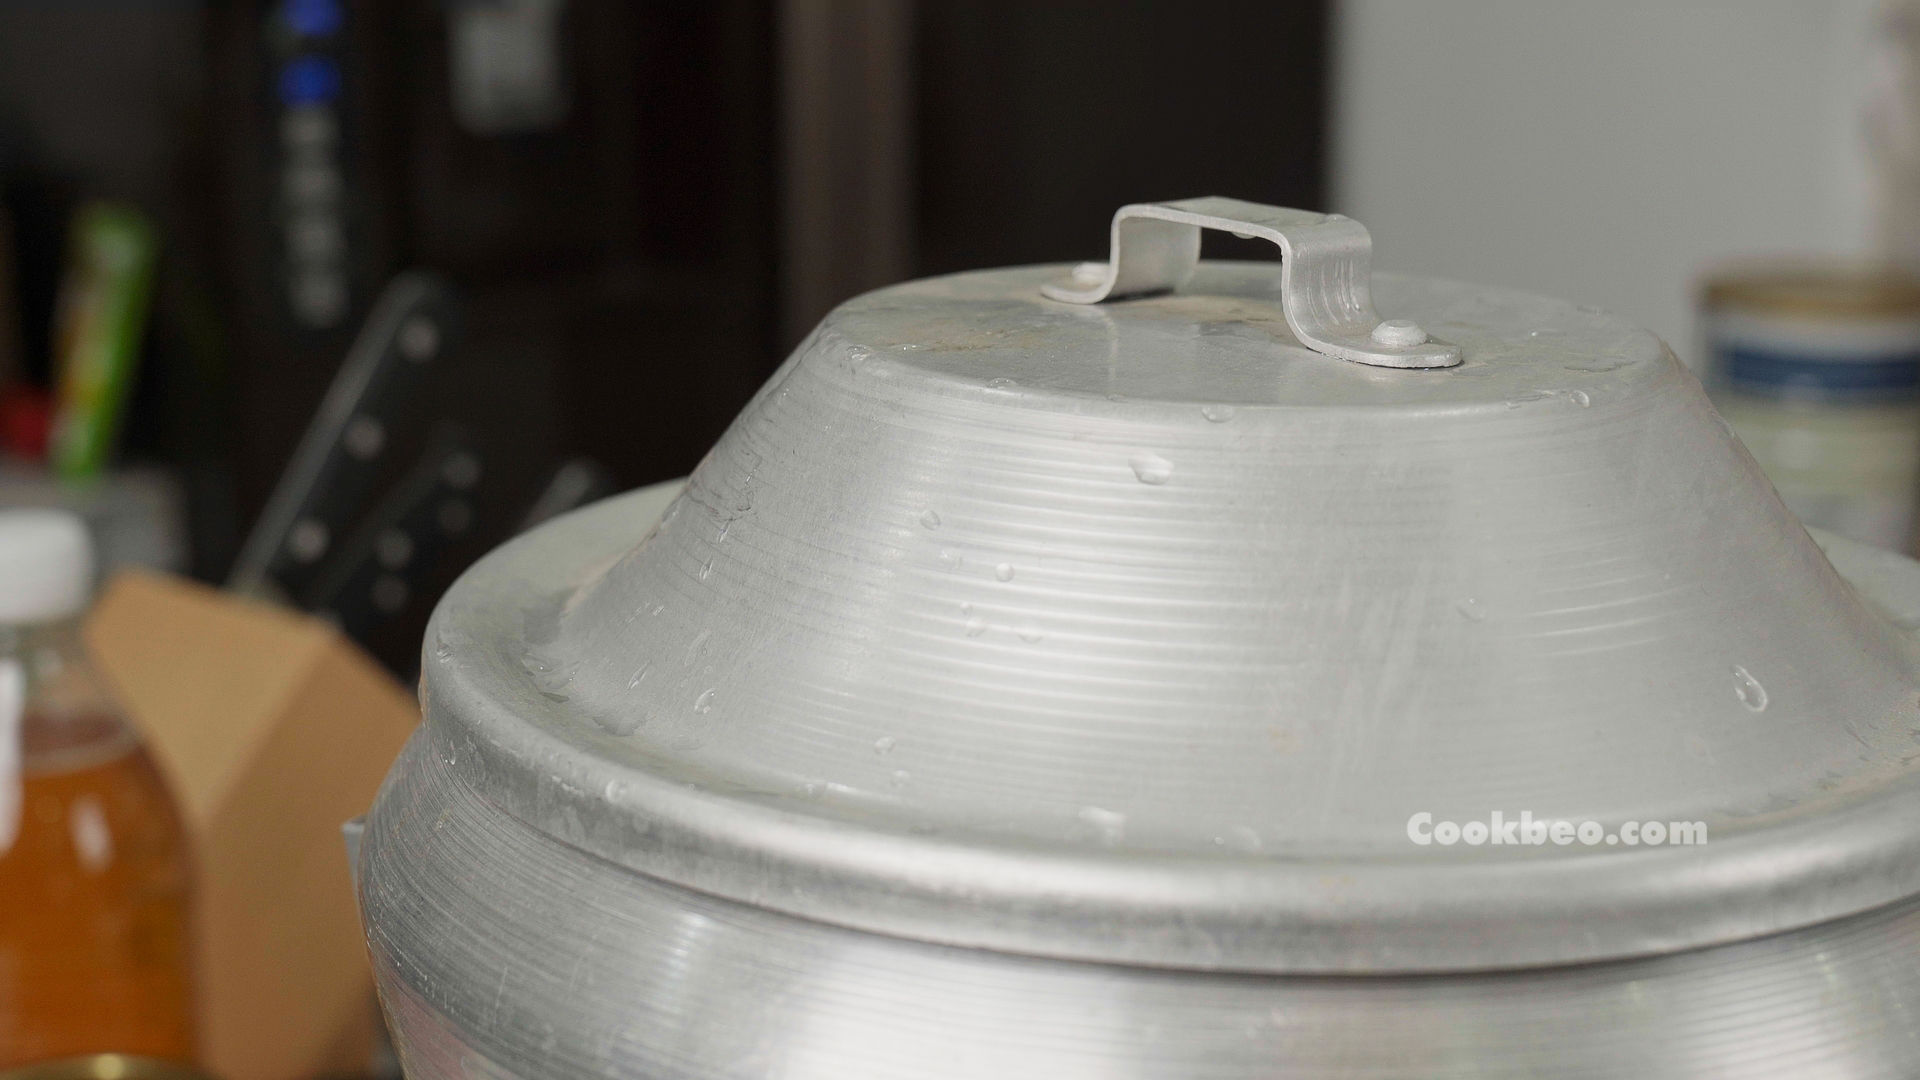
Fill the steamer pot with water, ensuring the water level is halfway up to the steamer basket. Bring the water to a boil before adding the rice to ensure even cooking.
Spread the rice evenly in the steamer and poke a few holes in the surface to allow steam to circulate. Cover the pot and steam over low heat.
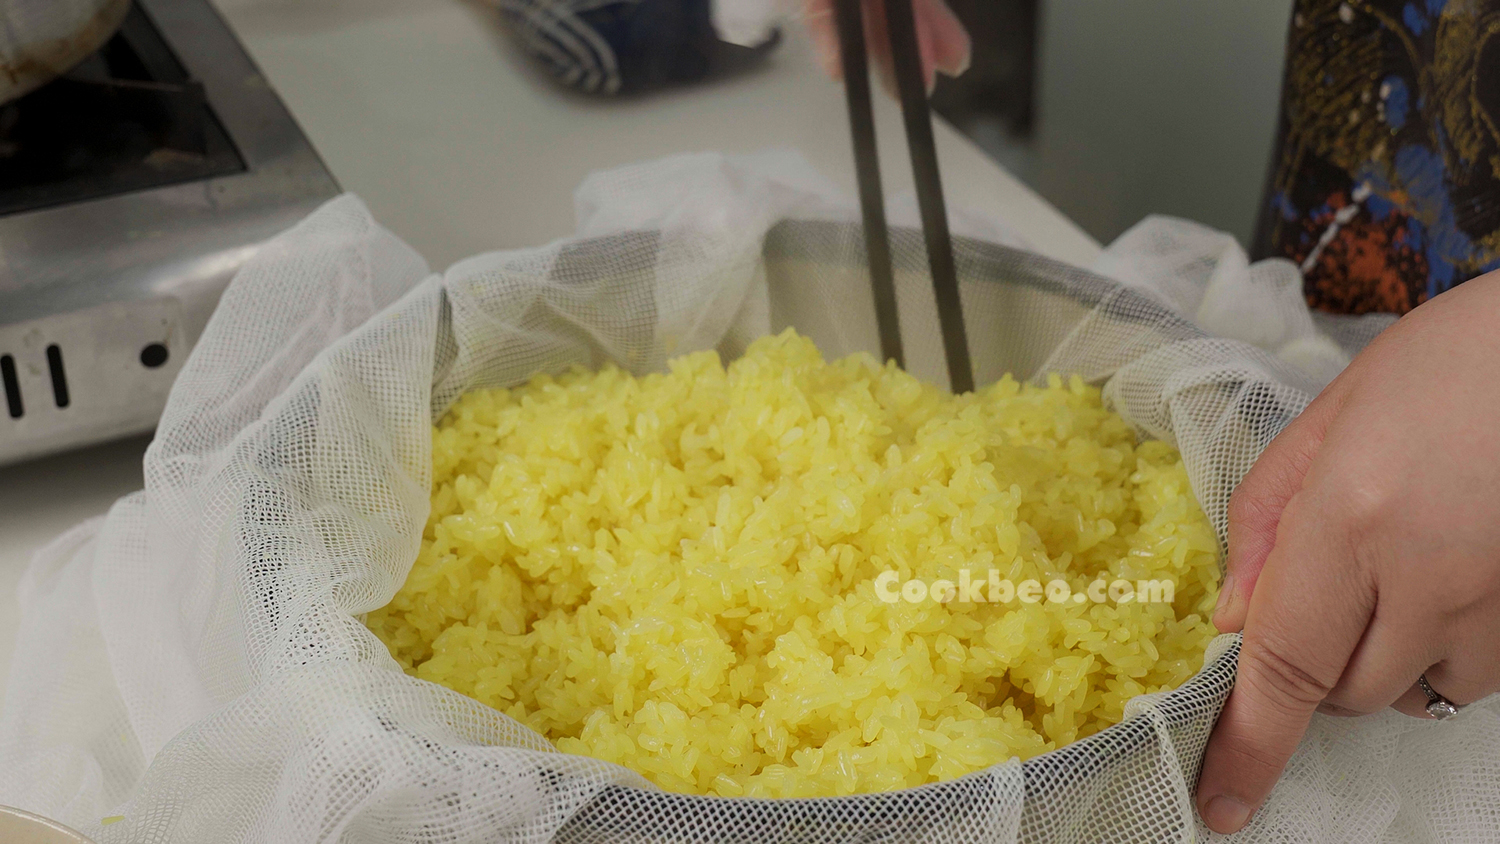
To make the best Xôi Xéo, as well as other types of sticky rice, it's best to steam the rice twice. The first steaming should last about 30 minutes. The second steaming should take about 15-20 minutes. Steaming the rice twice helps it stay tender and prevents it from becoming hard as it cools.
After the first steaming, remove the rice bag from the steamer. Mix in 2 more tablespoons of rendered chicken fat and let the rice rest for about 10 minutes before the second steaming.
For the second steaming, bring the water back to a boil before adding the rice bag. Spread the rice evenly and poke holes for steam circulation. If you have pandan leaves, wash and add 2-3 sprigs to the rice for fragrance. Be careful not to add too much, as the pandan scent can overpower the natural sweetness of the rice.
After 15-20 minutes of the second steaming, turn off the heat and fluff the rice onto a plate or bowl. Slice the mung bean ball into thin, small pieces, then sprinkle with a bit of pork floss. Add the crispy fried shallots, and finally, drizzle a few teaspoons of the shallot-infused chicken fat over the rice. Your fragrant, rich, and incredibly delicious Xôi Xéo is now ready to serve.
Video
Additional Information
The origin of the name Xôi Xéo is still unclear; some say it comes from the way the mung beans are sliced thinly (xéo). Regardless, this dish has become a beloved memory for many generations of Hanoi residents. It's the image of excited children lining up, and adults in a hurry in the early morning, stopping by a street vendor to buy a warm, fragrant bundle of Xôi Xéo wrapped in dong, banana, or lotus leaves.
In the past, Hanoi's Xôi Xéo was simply made from sticky rice soaked with gardenia leaves for color, steamed, topped with sliced mung beans, sprinkled with fried shallots, and drizzled with chicken or pork fat, all neatly wrapped in fragrant leaves. Later, pork floss, cinnamon pork rolls, braised pork, and braised eggs were added as accompaniments. However, the essence of Xôi Xéo, with its light yellow sticky rice, golden mung bean slices, crispy fried shallots, and rich, smooth chicken fat, remains cherished and preserved.


